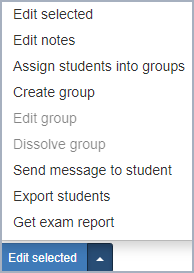
On the student tab, there are a number of different functions among other things assign an individual time to the students, write notes
Click the arrow on the right to access these additional features; if you just need to change individual time and write a note you can click directly on the blue button
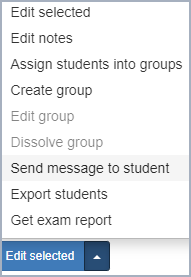
Edit selected
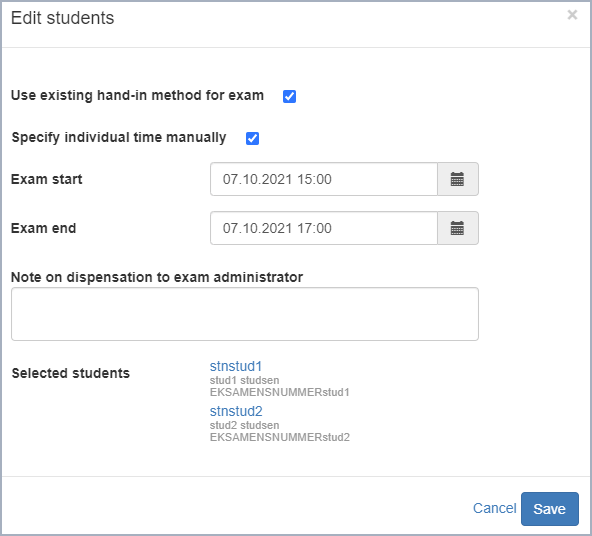
Here you can choose to hide the exam from the students (by unchecking the box) meaning that the exam will not be visible in the student’s exam overview
You can choose to assign an individual start and end time if the exam start and end does not apply to specific students
Group formation
If the students must (or are allowed to) to submit in groups, the administrator must go to the exam data tab and set “Exam submission condition” to “Free groups allowed” or “Forced exam group”. Remember to press ‘Save’ at the bottom of the page to allow the changes to take effect.
The students can form groups themselves if free group formation is chosen (If ‘Free groups allowed’ is selected, a maximum or/and minimum per group can be set in the exam data tab)
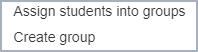
Groups formed by the administrator (mass creation or one at a time)
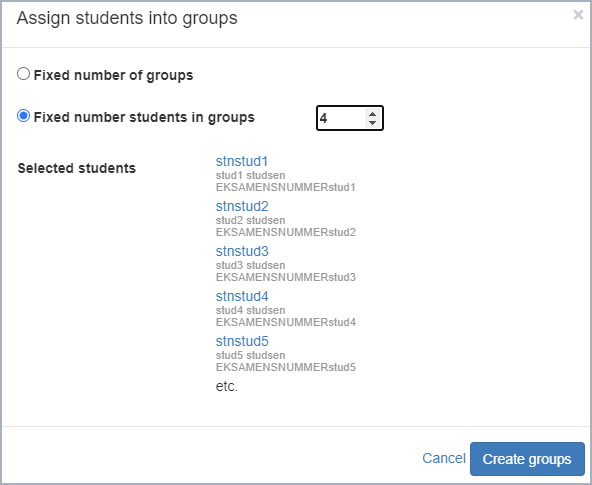
Select several or all students and click “Assign students to groups” (mass creation)
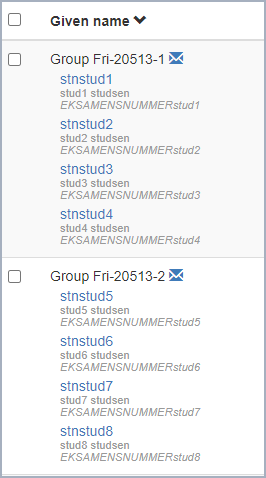
Select Fixed number of groups or Fixed number of students in groups and select a number
Press create groups and the groups will be formed (free groups can be dissolved again via “Dissolve the group)
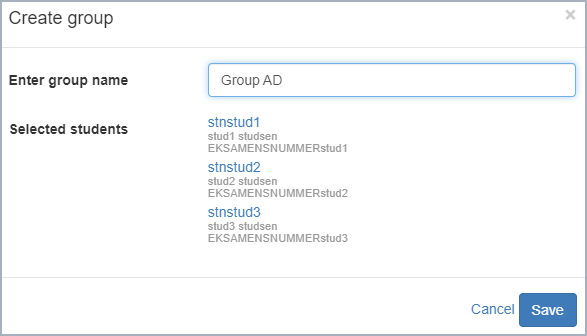
Check the relevant students
click on “Edit selected” and
“Create group” (on group at a time)
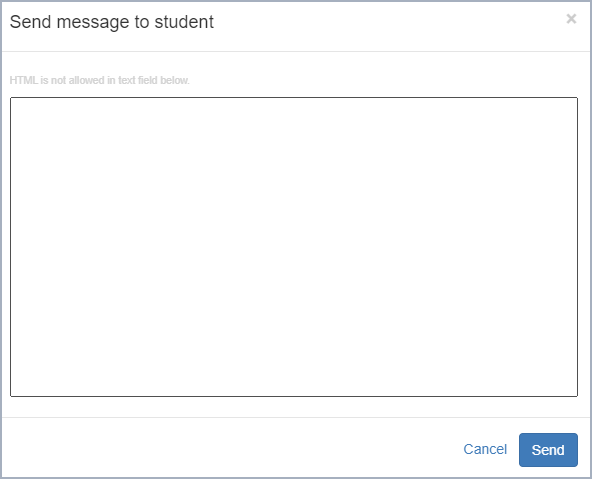
Send a message to the students (a simple message from the student tab)
Select one or more students and write a simple message Click Send message NOTE: It is not possible to format the message, insert links etc. In that case send an email from the email tab
Students cannot see who else the email has been sent to